When composing a photograph, you need to be aware of the different elements. Elements such as lines, shapes, colors and textures can all be used to create a compelling scene. A photographer’s job is to take in those elements and use them to create a visually appealing composition. A perfect photo composition relies on the photographer’s ability to frame and present those elements in an interesting way.
Photographic composition is something that all photographers should have in mind when taking photos. It can help you capture a scene much better and it can help you compose a photo in a way that is pleasing to the eye. The composition of a photo is what captures the viewer’s attention, it’s what makes them want to look at your photograph. The composition has an effect on how people see your photo, which then has an effect on how they might feel about it.
Photographic composition is something that all photographers should have in mind when taking photos. It can help you capture a scene much better and it can help you compose a photo in a way that is pleasing to the eye. While there are no strict rules for composing photographs, there are guidelines and principles that most photographers follow to be successful with.
Photography composition is a term used to refer to where and how the different elements in a photo are arranged. Composition is an important concept in photography because it influences what a viewer sees and how they see it.
A photographer can take an average photo with mediocre composition, but by changing the framing or zoom, he or she can make that same average photo into something extraordinary. It’s important to know about composition when you’re taking pictures, because it will determine whether your photos will look good or not. Photography is a form of art and it’s important that we understand the composition of our pictures.
Watch our videos on youtube (strctblog) and kindly subscribe

Rule of Thirds and the Golden Ratio
Every picture tells a story. And just like every good story has a protagonist, every picture should have a focal point. The focal point is what your audience will look at first. It is the center of attention that shapes the eye movement in your picture. The rule of thirds says that you should divide your frame into nine equal parts by two lines. You can do this by dividing it into four squares and then drawing two lines through them horizontally and vertically to make nine boxes. The rule states that three of these boxes should be on either side of the frame with the remaining four boxes along the bottom and top edges of the frame (one on each edge).
The rule of thirds is a composition technique in photography where you place the subject of interest at either one third or two thirds of the frame. The Golden Ratio is a visual arts concept that can be used to improve your photography. For example, you can try to put the horizon at either one third or two thirds of the frame.


READ ALSO
Photography: All About Photography
The rule of thirds says that placing subjects at one third or two thirds lines from the edge of the frame may help create more interesting compositions. The golden ratio is a ratio found in natural world, which can be considered a natural law.
There are a variety of different ways to use the rule of thirds and golden ratios when framing a picture for social media. For example, you can imagine framing your subject by imagining two intersecting lines going down your phone screen at an angle.
The rule of thirds and the golden ratio are helpful tools for photography composition, but they don’t have to be followed all the time. Experiment with these different rules and see what works best for you!
Thirteen Rules for Better Portraits
It is always a good idea to start by reading this list of nine rules for better portraits.
It’s easy to see why portraits are the most popular type of photography. Whether it’s for your family, yourself, or your business, we all like to be seen (or captured) on camera and appreciated for who we are. But there is a science behind capturing a great portrait and not just relying on luck.
1. The Rule of Thirds:
The first rule of good photography is the rule of thirds. Divide your frame into three sections, horizontally and vertically. Then, place your subject on the intersection of those lines. Next, use those lines to align other items in your photograph as well as horizon lines or roads in the background. This technique will make for a more balanced photograph and allow you to avoid placing your subject’s face directly in the center of a frame.
2. The Rule of Odds:
In order to create balance within a portrait, it is important that you place an odd number of subjects on either side of a frame or divide up a single subject into two or more sections within a frame using line(s). This will draw attention to the person you want to view.
3. Perspective
The rules for better portraits are not just about the camera. They are also about understanding lighting and perspective.
Perspective is one of the most important factors to make your portrait stand out. The photographer should take advantage of the environment, especially when you are either inside or outside, to make this happen. You can use doorways, furniture or walls to create a sense of depth in your photograph to make it more interesting for viewers.
4. Focal length
Focal length should be adjusted to suit the distance between the subject and the background. A long focal length lens is best used for photographing someone who is standing further away from you while a shorter focal length lens would be good for an up-close shot.
5. Camera Angle
No matter what type of camera you are using, you should always know the right angle to shoot at. The best portrait photographers will shoot at eye level, but if you are shooting on a higher or lower level than your subject, then there is a good chance that the photograph will be more dramatic and interesting.
6. Subject Distance
As mentioned earlier, it is important that you photograph people from their eye level for the best results. If they are too far away from the camera lens then they might look distorted in your photograph and also very small. If they are too close to the camera lens then they might look like an ant in the frame and again distort their features like they would be getting very close to your face when you meet them for real life conversation.
7. Always use the camera strap to secure your camera.
8 . Take the time to set up your camera before you start shooting.
9 . Take more than one photo of your subject, at different angles and with different focal lengths.
10 . Watch for lines in the background that may draw attention away from your subject (e.g., power lines).
11 . Shoot portraits in open shade when possible; direct sunlight can cause unsightly shadows on faces, hands, and other delicate features like clothing or jewelry.
12 . If you can’t find open shade, experiment with reflectors or diffusers.
13 . Give yourself enough time to shoot so that the sun doesn’t set before you finish!


How to Create a Dramatic Image
Here are a few creative photography ideas:
1. Avoid taking photos in the middle of the day or when there is too much light. Instead, take photos in the early morning or just before sunset.
2. Use a low aperture to blur your background and make your foreground object, such as a person, stand out more dramatically.
3. Capture movement by following it with your camera and pressing the shutter button at the right time to capture an action shot.
4. Be creative with lighting and angles and you’ll be able to come up with some dramatic images for your story!
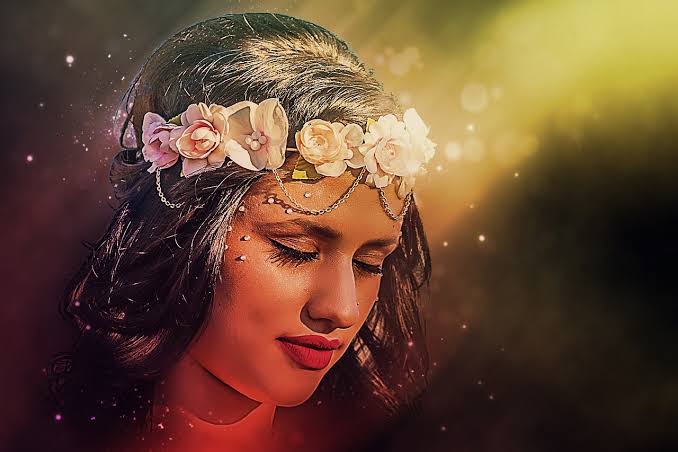
In order to make a good photo, you need a compelling image. A great way to make this happen is by photoshopping it. There are some cool ways you can do this, and we’ll share some helpful tips that will help anyone create a dramatic image.
Dramatic images convey a certain mood or emotion to the viewer. They are powerful in conveying the message of the photographer and when used correctly, they can make an image memorable. In order to create a dramatic image, photographers should prepare for obstacles that may be present in the environment. Finding natural light sources is crucial for producing great images. You can improve your chances of making a good dramatic image by considering the following:
– The time of day – The time of day can dramatically alter how your photo will turn out. Shoot during golden hour to get ideal light conditions.
– Consider where you are shooting – It makes sense that if you’re surrounded by buildings, you’ll want to shoot up at them rather than down at them to create more dynamic lighting.
A dramatic image has the potential to capture the attention of the viewer. It can also help convey a message or invoke an emotion.
A few things to keep in mind when creating a dramatic image:
– Test out different lighting to see what works best for your subject;
– Focus on your subject;
– Try experimenting with different angles and perspectives;
– Take advantage of natural or manmade structures like stairs, arches, windows, etc.;
– Add other elements like water, graffiti, flowers etc.
– Try to think of an idea that is uniquely your own.
– Make sure that the setting is appropriate to what you are trying to convey.
– Choose a good composition for the image.
– Put some thought into how you light your subject, the different ways it can be done, and what mood this will convey to the viewer
In the world of photography, a good photograph is not just about capturing an image. The image should have a certain aesthetic that draws your attention and keeps it there.
Conclusion: Start Applying These Techniques in Your Photos Today To Transform The Mood & Create an Emotional Connection